
Try It At Home: Turning Sound Into Light
- By Sara Mitchell
- January 22, 2013
- Comments Off on Try It At Home: Turning Sound Into Light
This is a long-overdue follow-up to the blog where we showed you how to eavesdrop on the signals coming from your remote control, turning the infrared light patterns into sound through a simple circuit with a photocell and an amplifier/speaker. In this Try It At Home activity, we’ll build another circuit – and this one will turn your favorite songs into pulses of light to be received by the first circuit. Put the two circuits together and, well… we’ll show you what happens at the end of this entry!
Here’s the set-up:
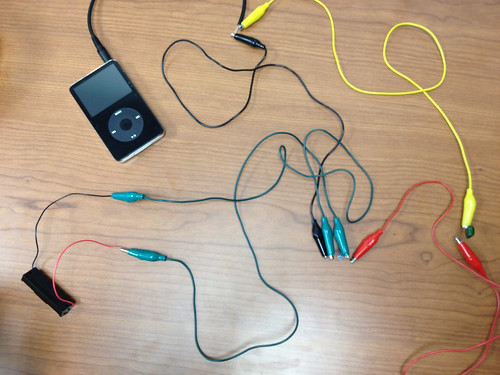
This circuit has a few more pieces than the last one, but again, these are items that you should be able to pick up from an electronics or computer supplier:
– An infrared LED
– A 0.22 μF (that’s a microfarad) capacitor
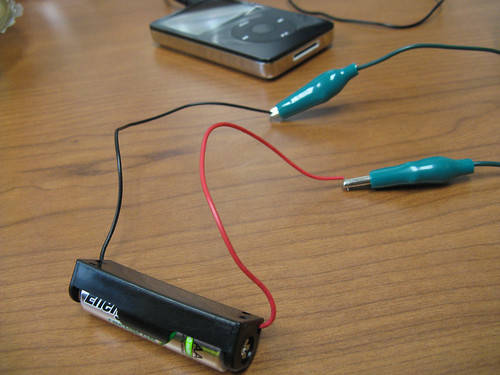
– An AA battery in an AA battery holder
– An audio cable with a 1/8″ plug on one end and two wire leads on the other
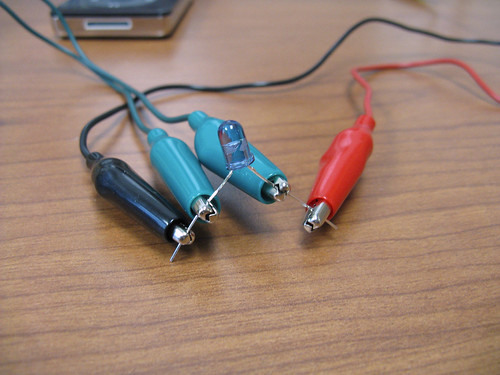
– Five test leads with jumper clips on each end
– An audio source
We’ll take you step-by-step through building this circuit. It looks more complicated than it actually is, mostly due to all of the long wires between parts! Building these circuits is really a breeze, you just clip the test leads to the wires on the components. We used multicolor test leads to help you see what’s connected, but they’re all the same thing – an insulated wire with a clip at each end.
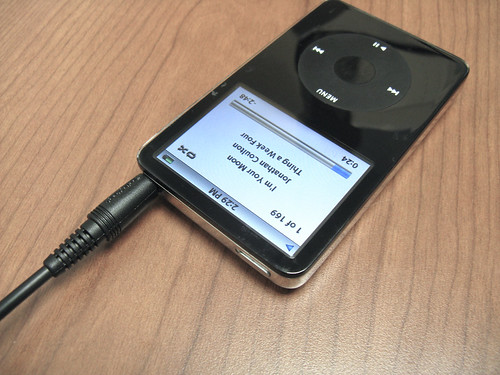
The first step is something you’ve probably done thousands of times before: insert the 1/8″ plug into your audio source. We used an mp3 player, but you can use any sound-producing device that has the appropriate jack.
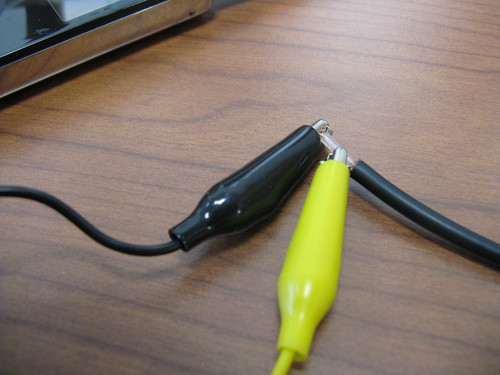
The other end of this audio cable should have two bare wires coming out of it. Clip one test lead to each of these wires.
Now, clip one of these test leads to the wire “leg” of a capacitor. The capacitor stores and regulates electricity in this circuit. Clip a new test lead to the other leg of the capacitor.
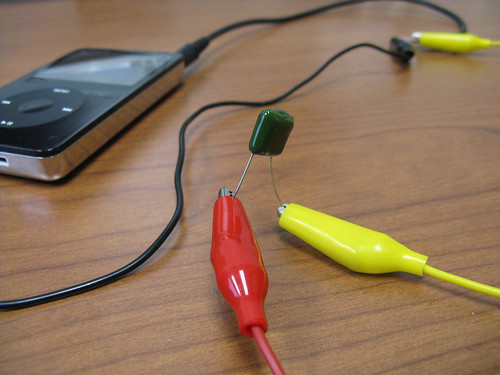
This next step introduces a very important part of the circuit – the light-emitting diode, or LED. They’re increasingly used in everyday life for everything from the backlight in your car’s dashboard to high-efficiency light bulbs (which contain multiple LEDs). The LED used in this particular circuit produces infrared light that our eyes cannot detect… but the receiver circuit can!
From our earlier steps, you should have two test leads with available clips – one coming from the audio cable, and one coming from the capacitor. Clip each of these to a wire leg of the LED.
Technically, you’ve already made a complete circuit, because your wires should form a full loop for electricity to flow. However, you’ve still got one more critical component to add – the battery. Put your AA battery inside a battery holder, and clip one test lead to each of its cables. Then clip the other ends of these test leads to the legs of the LED, alongside the clips that are already there. And now you’re done!
Here’s the full circuit once again, this time with the components labeled so you can double-check your own circuit if you’d like.

And now, the moment of truth – combine the two circuits (the one that turns sound into light, and the one that turns light into sound), and transmit your choice of audio through the air! Just hold the LED from the transmitter circuit you built from this blog post over the photocell from the receiver circuit you built from this blog post.
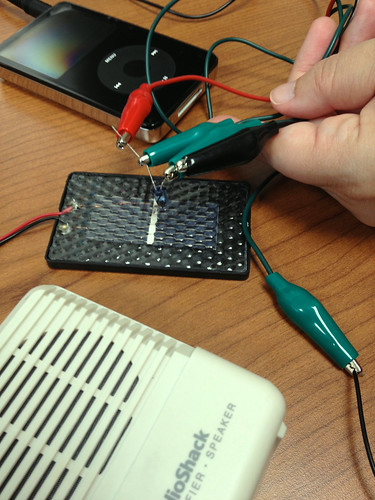
Press play on your audio source and turn on the speaker in the receiver circuit. You won’t see any light coming from the LED, since it is producing infrared light. But if it’s all working properly, this is what should happen:
Audio from Tom Lehrer’s “The Elements” sampled under fair use for non-profit, educational purpose.
Besides the novelty of turning your favorite audio into pulses of light and then into sound, you can also do a fun little experiment with these two circuits. You can put a variety of materials between the LED and photocell and see what blocks the light… and what allows it to pass through. There can be some surprises there, and it’ll help you understand why your remote controls transmit a signal through some materials but not through others.
Once again, thanks to SOFIA’s Active Astronomy for introducing us to both circuits. You can find more detailed background and information on classroom usage on their site. If you’d like more information about the parts used in building this circuit, please get in touch via our feedback form.